
Skills Catalog
The clinical skills behind every Skillform product. Starting with CNA across all major exam providers (Credentia, Headmaster, Prometric) and 47 states, with more healthcare roles on the way. Browse 54 skills and the exact step-by-step checklist behind each one.
Showing 54 of 54 skills
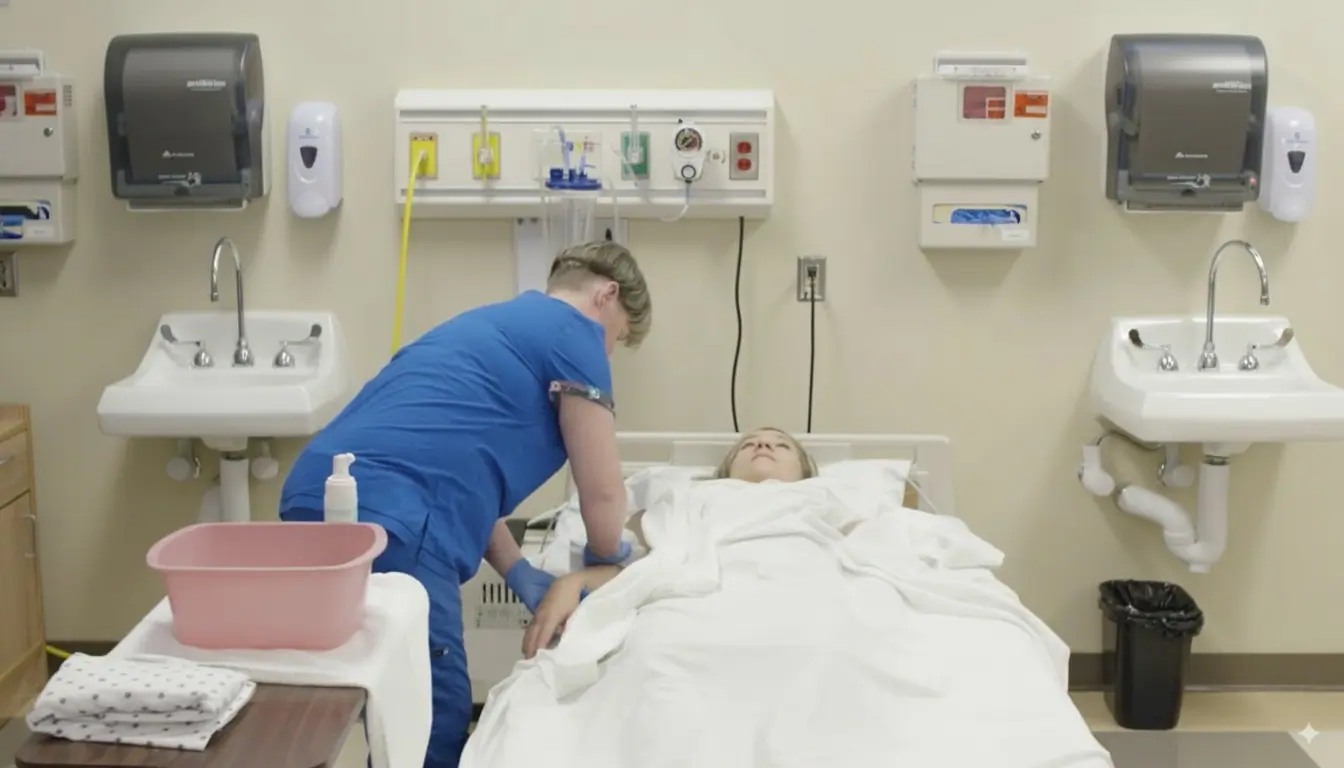
Hygiene
Dresses Client
CredentiaHeadmasterPrometric· 47 states
7 min
- 1Knock before entering the room. Identify and greet resident. Explain procedure. Perform hand hygiene. Provide for privacy.
- 2Raise bed rails. Raise bed to best level for good body mechanics. Critical
- 3Lower side rail on resident's weak side. Place in supine position.
- 4Cover resident with bath blanket. Fanfold linens to foot of bed without exposing resident.
- 5Raise resident's head and shoulders or turn onto side away from nurse aide.
- 6Unfasten buttons, snaps, zippers, or ties in back of garment.
- 7Bring sides of garment to the resident's sides, or if in side-lying position, tuck far side under resident and fold near side onto chest.
- 8Place resident in supine position.
- 9Slide garment off shoulder on resident's strong side. Remove garment from the arm. Repeat for weak side.
- 10Put on garments that open in the front: slide garment onto arm and shoulder of weak side.
- 11Raise head and shoulders. Bring side of garment around the back. Lower resident to supine position.
- 12Slide garment onto the arm and shoulder of the strong arm.
- 13Fasten buttons, snaps, zippers, or ties.
- 14Put on pants or slacks. Slide pants over feet and up the legs.
- 15Turn onto the strong side and pull pants over buttocks and hip of weak side.
- 16Turn resident to the weak side and pull pants over buttocks and hip of strong side.
- 17Place resident in supine position and fasten buttons, snaps, zippers, ties, and/or belt buckle.
- 18Remove bath blanket.
- 19Put socks and shoes or slippers on resident.
- 20Raise side rail. Lower bed. Lower side rail. Attach signal light within resident's reach. Critical
- 21Perform hand hygiene and report & record observations.
Hygiene
Mouth Care
CredentiaHeadmasterPrometric· 47 states
5 min
- 1Knock on the door
- 2Introduce yourself to the resident
- 3Perform hand hygiene: a. Cover all surfaces of hands with hand sanitizer, b. Rub your hands together until they are completely dry
- 4Explain the procedure to the resident
- 5Provide privacy for the resident, pull the curtain
- 6Drape the resident's chest with a towel to prevent soiling
- 7Put on gloves
- 8Apply toothpaste to the resident's toothbrush or toothette
- 9Brush the resident's teeth, including the inner surfaces of all upper and lower teeth Critical
- 10Brush the resident's teeth, including the outer surfaces of all upper and lower teeth Critical
- 11Brush the resident's teeth, including the chewing surfaces of all upper and lower teeth Critical
- 12Clean the resident's tongue
- 13Assist the resident in rinsing their mouth
- 14Wipe the resident's mouth
- 15Remove soiled linen
- 16Place soiled linen in the designated linen hamper
- 17Empty the emesis basin
- 18Rinse the emesis basin
- 19Dry emesis basin
- 20Rinse the toothbrush or discard the toothette
- 21Return equipment to storage
- 22Remove gloves, turning them inside out
- 23Dispose of gloves in an appropriate container
- 24Leave the resident in a position of comfort
- 25Perform hand hygiene: a. Cover all surfaces of hands with hand sanitizer, b. Rub your hands together until they are completely dry
- 26Place the call light or signal calling device within easy reach of the resident
- 27Maintain respectful, courteous interpersonal interactions at all times
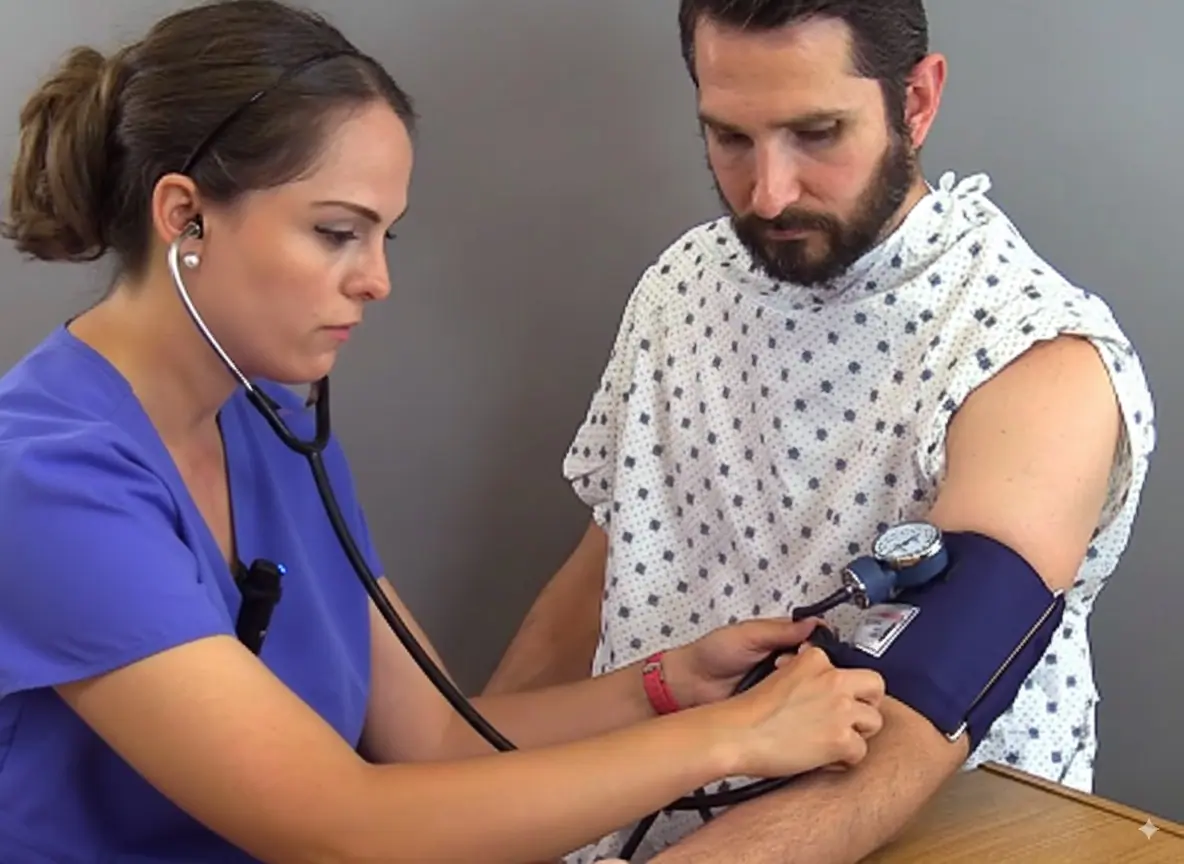
Vital Signs
Counts Radial Pulse
CredentiaHeadmasterPrometric· 47 states
8 min
- 1Greet the resident by name.
- 2Perform hand hygiene: Cover all surfaces of hands with hand sanitizer and rub hands together until completely dry.
- 3Introduce yourself by name.
- 4Explain the procedure to the resident.
- 5Locate the resident's radial pulse by placing the tips of fingers on the thumb side of the resident's wrist.
- 6Count the pulse for 60 seconds or 30x2. Tell the RN Test Observer when you start counting and tell them when you stop counting.
- 7Record the pulse rate on the previously signed recording form.
- 8The candidate's recorded pulse rate is within four (4) beats of the RN Test Observer's recorded pulse rate. Critical
- 9Count the respirations for 60 seconds or 30x2. Tell the RN Test Observer when you start counting and tell them when you stop counting.
- 10Record respirations on the previously signed recording form.
- 11The candidate's recorded respiratory rate is within two (2) breaths of the RN Test Observer's recorded respiratory rate. Critical
- 12Obtain a gait belt.
- 13Position the wheelchair at the foot or head of the bed.
- 14Lock wheelchair brakes to ensure resident's safety. Critical
- 15Lock bed brakes to ensure resident's safety. Critical
- 16Assist resident to a sitting position (on the edge of the bed) using proper body mechanics.
- 17Place a gait belt around the resident, below the rib cage, and above the waist, to stabilize the trunk.
- 18Tighten the gait belt so that the fingers of the candidate's hand can be comfortably slipped between the gait belt and the resident.
- 19Assist the resident in putting on non-skid slippers/shoes (no non-skid socks).
- 20Adjust the bed so that the resident's feet are comfortably flat on the floor.
- 21Grasp the gait belt with both hands to stabilize the resident.
- 22Bring the resident to a standing position using proper body mechanics.
- 23Do not attempt to ambulate the resident. Critical
- 24Assist the resident in pivoting and sitting in a controlled manner.
- 25Remove the gait belt.
- 26Perform hand hygiene: Cover all surfaces of hands with hand sanitizer and rub hands together until completely dry.
- 27Place the resident within easy reach of the call light or signaling device and water.
- 28Maintain respectful, courteous interpersonal interactions at all times.
Elimination
Assists with Bedpan
CredentiaHeadmasterPrometric· 46 states
7 min
- 1Perform hand hygiene: Cover all surfaces of hands with hand sanitizer
- 2Rub hands together until hands are completely dry
- 3Explain the procedure to the resident (Speak clearly and directly, maintaining face-to-face contact whenever possible)
- 4Provide for privacy
- 5Put on gloves
- 6Position resident on bedpan/fracture pan safely and correctly (Pan not upside down, is centered, etc.)
- 7Remove gloves, turning them inside out as they are removed and dispose of
- 8Perform hand hygiene: Cover all surfaces of hands with hand sanitizer
- 9Rub hands together until hands are completely dry
- 10AFTER positioning the resident on the bedpan/fracture pan and removing gloves, raise the head of the bed to a comfortable level
- 11Leave tissue within reach of the resident
- 12Leave the call light or signaling device within reach of the resident
- 13Step behind the privacy curtain to provide privacy for the resident
- 14When the RN Test Observer indicates, the candidate returns
- 15Put on gloves (NOTE: 2nd glove change required)
- 16Lower the head of the bed BEFORE gently removing the bedpan
- 17Hold the bedpan for the RN Test Observer while an unknown quantity of liquid is poured into the bedpan
- 18Place the graduate on a level flat surface
- 19Pour bedpan contents into the graduate without spilling or splashing urine outside of the graduate
- 20With graduate at eye level, measure output
- 21Empty equipment used into designated toilet/commode
- 22Rinse equipment used and empty rinse water into the designated toilet/commode
- 23Return equipment to storage
- 24Remove gloves turning them inside out as they are removed and dispose
- 25Perform hand hygiene: Cover all surfaces of hands with hand sanitizer
- 26Rub hands together until hands are completely dry
- 27Wash/assist resident to wash and dry hands with soap and water
- 28Place soiled linen in the designated laundry hamper
- 29Perform hand hygiene BEFORE recording output: Cover all surfaces of hands with hand sanitizer
- 30Rub hands together until hands are completely dry
- 31Record output in mls on the previously signed recording form
- 32The candidate's recorded measurement is within 25mls of the RN Test Observer's reading Critical
- 33Place call light or signaling device within easy reach of the resident
- 34Maintain respectful, courteous interpersonal interactions at all times
- 35Turn on the faucet
- 36Wet hands and wrists thoroughly
- 37Apply soap to hands
- 38Rub hands together using friction with soap
- 39Scrub/wash hands together for at least twenty (20) seconds with soap Critical
- 40Scrub/wash with interlaced fingers pointing downward with soap
- 41Wash all surfaces of your hands with soap
- 42Wash wrists with soap
- 43Clean fingernails by rubbing fingertips against the palm of the opposite hand
- 44Rinse fingers, hands, and wrists thoroughly under running water with fingers pointed downward
- 45Starting at the fingertips, dry fingers, hands, and wrists on a clean paper towel(s)
- 46Discard paper towels to trash container as used
- 47Turn off the faucet with a clean, dry paper towel and discard the paper towel to the trash container as used, or use knee/foot control to turn off the faucet
- 48Do not re-contaminate hands at any time during the handwashing procedure Critical
Hygiene
Denture Care
CredentiaHeadmasterPrometric· 46 states
5 min
- 1Knock on the door
- 2Introduce yourself to the resident
- 3Perform hand hygiene: a. Cover all surfaces of hands with hand sanitizer, b. Rub your hands together until they are completely dry
- 4Explain the procedure to the resident
- 5Line the bottom of the sink with a protective lining (such as a towel, washcloth, or paper towel) or fill the sink with water to prevent damage to the denture in case it is dropped
- 6Put on gloves
- 7Carefully remove the denture from the cup
- 8Handle the denture carefully to avoid damage
- 9Rinse the denture cup
- 10Never place the denture on or in a contaminated surface
- 11Apply denture cleanser or cream to a denture brush or toothbrush
- 12Thoroughly brush the inner surfaces of the denture
- 13Thoroughly brush the outer surfaces of the denture
- 14Thoroughly brush the chewing surfaces of the denture
- 15Thoroughly brush the denture groove or plate that touches the gum surface
- 16Rinse the denture using clean, cool running water
- 17Place the denture in a rinsed denture cup
- 18Add cool, clean water to the denture cup
- 19Rinse equipment
- 20Dry equipment
- 21Return equipment to storage
- 22Place the sink protective lining in an appropriate container or drain the sink
- 23Remove gloves, turning them inside out
- 24Dispose of gloves in an appropriate container
- 25Place the call light or signal calling device within easy reach of the resident
- 26Maintain respectful, courteous interpersonal interactions at all times
- 27Perform hand hygiene: a. Cover all surfaces of hands with hand sanitizer, b. Rub your hands together until they are completely dry
Hygiene
Modified Bed Bath
CredentiaHeadmasterPrometric· 46 states
10 min
- 1Knock before entering the room. Identify and greet resident. Explain procedure. Perform hand hygiene. Provide for privacy.
- 2Fill bath basin 2/3 full of warm water.
- 3Raise bed rails. Raise the bed to best level for good body mechanics. Critical
- 4Lower bed rail and position resident in supine position.
- 5Cover the resident with a bath blanket and remove top linens.
- 6Place towel across resident's chest. Remove the gown without exposing the resident.
- 7Make mitten of washcloth and wet with water; squeeze out excess.
- 8Wash eyes first. Start at inner corner and work out. Use different area of mitten for each eye.
- 9Wash, rinse, and dry the face.
- 10Wash, rinse, and dry the ears and then neck.
- 11Expose arm farthest from the side. Place bath towel under arm up to axilla.
- 12Place basin of water on bed and immerse resident's hand in water and wash. Remove the basin and dry hand well.
- 13Wash, rinse, and dry the shoulders, axillae and arms.
- 14Repeat steps 11, 12, & 13, using nearest arm (may verbalize this step).
- 15Place towel across chest and fold bath blanket to waist.
- 16Wash, rinse, and dry chest while lifting towel.
- 17Fold bath blanket to pubic area, keep chest covered with towel.
- 18Wash, rinse and dry abdomen. Remove the towel and cover with bath blanket.
- 19Raise the side rail before leaving the bedside. Change bath water in basin. Critical
- 20Lower bed rail.
- 21Expose the far leg; flex leg and place bath towel lengthwise under the leg up to the buttocks.
- 22Place basin on towel and put foot into it. Support leg at knee joint with hand.
- 23Wash and rinse leg and foot.
- 24Remove basin of water and dry leg, foot, and between toes.
- 25Repeat steps 21 - 24 for near leg (may verbalize this step).
- 26Raise the side rail before leaving the bedside. Change bath water in basin. Critical
- 27Lower bed rail and assist resident to turn on side with back facing the aide.
- 28Fold the bath blanket over resident's side to expose back and buttocks; place towel parallel to resident's back.
- 29Wash, rinse, and dry back and buttocks.
- 30Give back rub and remove towel and turn resident onto back.
- 31Raise the bedrail before leaving the bedside. Change the water for perineal care. Critical
- 32Lower bed rail.
- 33Put on disposable gloves. Wash, rinse, and dry the perineum (may verbalize, perineal care tested on separate skill). Remove and discard gloves. Perform hand hygiene. Critical
- 34Raise the bedrail before leaving the bedside. Critical
- 35Lower bed rail on side nearest you. Apply lotion and deodorant.
- 36Without exposing the resident, dress him/her in a clean gown.
- 37Raise the bed rails. Lower bed. Lower bed rails. Attach signal light within resident's reach. Critical
- 38Perform hand hygiene and report & record observations.
Hygiene
Perineal Care
CredentiaHeadmasterPrometric· 46 states
15 min
- 1Knock on door.
- 2Introduce yourself to the resident.
- 3Perform hand hygiene: Cover all surfaces of hands with hand sanitizer and rub hands together until hands are dry.
- 4Explain the procedure to resident.
- 5Provide for privacy, pull privacy curtain.
- 6Raise the bed height.
- 7Fill basin with warm water.
- 8Obtain brief.
- 9Put on gloves.
- 10Direct the RN Test Observer to stand on the opposite side of the bed or raise side rail on opposite side of the bed to provide for safety.
- 11Turn resident or raise hips and place barrier under buttocks.
- 12Expose perineum only.
- 13Remove soiled brief.
- 14Discard soiled brief in the designated container.
- 15Remove gloves turning inside out as they are removed.
- 16Dispose of gloves in designated container.
- 17Perform hand hygiene: Cover all surfaces of hands with hand sanitizer and rub hands together until hands are dry.
- 18Put on gloves.
- 19Gently grasp the penis.
- 20Use a clean, soapy washcloth.
- 21Clean tip of penis starting at the urethral opening working outward away from the urethral opening.
- 22Clean shaft of the penis away from the tip of the penis.
- 23Use a clean portion of a washcloth with each stroke. Critical
- 24With a clean washcloth with soap and water, clean the scrotum.
- 25Clean scrotum with a clean portion of a washcloth with any stroke.
- 26With a clean washcloth, rinse penis.
- 27Rinse penis using a clean portion of a washcloth with each stroke.
- 28Rinse scrotum using a clean portion of a washcloth with each stroke.
- 29Pat dry the area.
- 30Remove gloves turning inside out as they are removed.
- 31Dispose of gloves in designated container.
- 32Perform hand hygiene: Cover all surfaces of hands with hand sanitizer and rub hands together until hands are dry.
- 33Put on gloves.
- 34Assist resident to turn onto side away from the candidate.
- 35Use a new soapy washcloth to clean the rectal area.
- 36Clean area from scrotum to rectal area using a clean portion of a washcloth with each stroke. Critical
- 37With a clean washcloth, rinse area from scrotum to rectal area.
- 38Use a clean portion of a washcloth with any stroke.
- 39Pat dry the area.
- 40Remove gloves turning inside out as they are removed.
- 41Dispose of gloves in designated container.
- 42Perform hand hygiene: Cover all surfaces of hands with hand sanitizer and rub hands together until hands are dry.
- 43Put on gloves.
- 44Apply a new brief.
- 45Ensure brief is even on both sides of the resident.
- 46Safely remove barrier from under buttocks.
- 47Dispose of all soiled linen in the designated container.
- 48Position resident on his back.
- 49Lower bed.
- 50Empty equipment.
- 51Rinse equipment.
- 52Dry equipment.
- 53Return equipment to storage.
- 54Remove gloves turning inside out as they are removed.
- 55Dispose of gloves in designated container.
- 56Perform hand hygiene: Cover all surfaces of hands with hand sanitizer and rub hands together until hands are dry.
- 57Leave resident in a position of comfort and safety.
- 58Place call light or signaling device within easy reach of the resident.
- 59Maintain respectful, courteous interpersonal interactions at all times.
- 60Wash hands: Begin by wetting hands.
- 61Wash hands: Apply soap to hands.
- 62Wash hands: Rub hands together using friction for at least 20 seconds with soap.
- 63Wash hands: Interlace fingers pointing downward with soap.
- 64Wash hands: Wash all surfaces of hands with soap.
- 65Wash hands: Wash all surfaces of wrists with soap.
- 66Wash hands: Rinse hands thoroughly under running water with fingers pointed downward.
- 67Wash hands: Dry hands on clean paper towel(s).
- 68Wash hands: Turn off faucet with a paper towel.
- 69Wash hands: Discard paper towels into trash container as used.
- 70Wash hands: Do not re-contaminate hands by touching faucet or sink at any time during/after the hand washing procedure. Critical
Nutrition
Feeds / Assists with Meal
CredentiaHeadmasterPrometric· 46 states
7 min
- 1Perform hand hygiene: Cover all surfaces of hands with hand sanitizer
- 2Rub hands together until hands are completely dry
- 3Explain the procedure to the resident
- 4Ask resident to state name and verify name matches the name on the diet card
- 5Position the resident in an upright, sitting position BEFORE feeding. At least 75-90 degrees Critical
- 6Protect clothing from soiling by using napkin, clothing protector, or towel
- 7Provide hand hygiene for the resident BEFORE feeding
- 8Ensure resident's hands are dry BEFORE feeding
- 9Place soiled linen in designated laundry hamper, or dispose disposable wipe in trash container, if either is used
- 10Sit in a chair, facing the resident, while feeding the resident
- 11Describe the food and fluid being offered to the resident
- 12Offer each fluid frequently
- 13Offer small amounts of food at a reasonable rate
- 14Allow resident time to chew and swallow
- 15Wipe resident's hands and mouth AFTER feeding the resident
- 16Remove clothing protector and place in designated laundry hamper. If napkin, dispose of in trash container
- 17Leave resident sitting upright in bed with the head of the bed set up to at least 45 degrees
- 18Record intake as a percentage of total solid food eaten on the previously signed recording form Critical
- 19Candidate's calculation must be within 25 percentage points of the RN Test Observer's Critical
- 20Record estimated intake as the sum total fluid consumed in ml's on the previously signed recording form Critical
- 21Candidate's calculation must be within 60ml of the RN Test Observer's Critical
- 22Place call light or signaling device within easy reach of the resident
- 23Maintain respectful, courteous interpersonal interactions at all times
- 24Perform hand hygiene: Cover all surfaces of hands with hand sanitizer
- 25Rub hands together until hands are completely dry
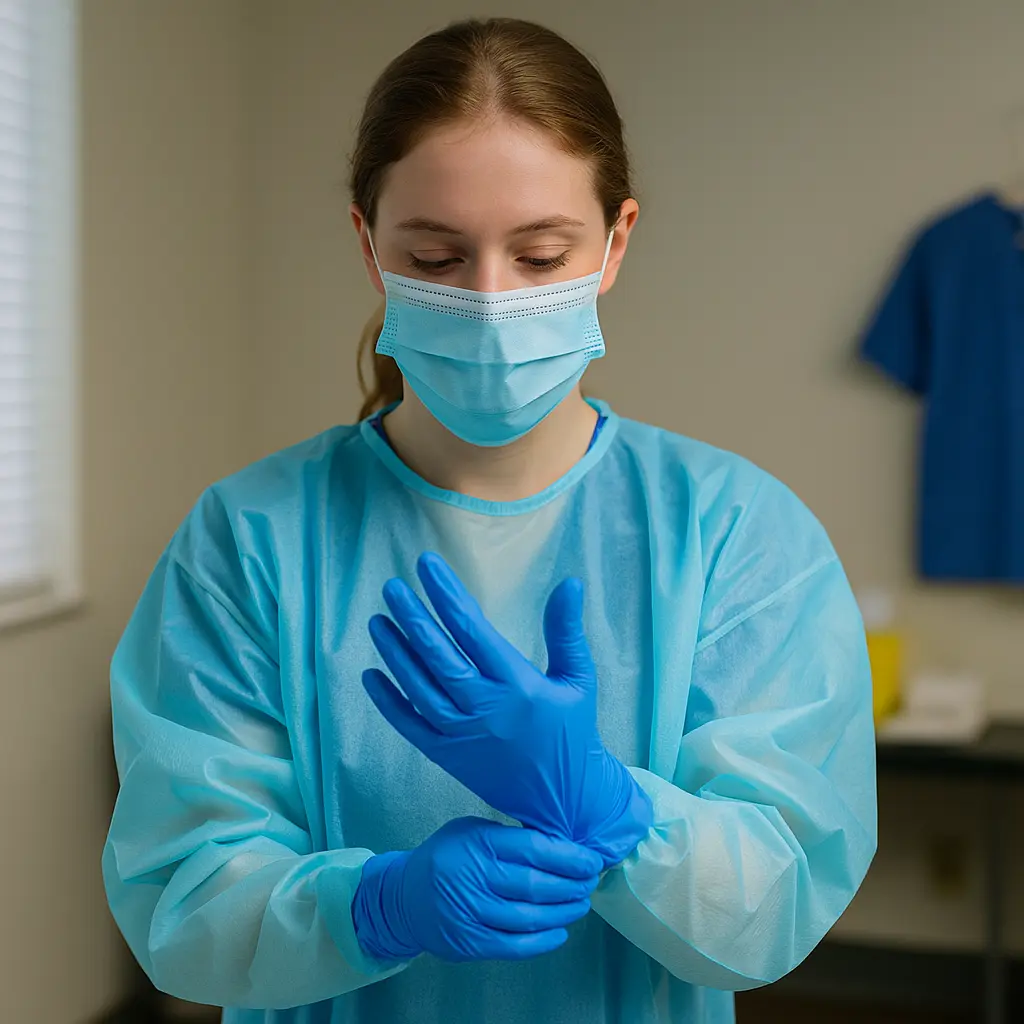
Elimination
Catheter Care
CredentiaHeadmasterPrometric· 45 states
8 min
- 1Perform hand hygiene: Cover all surfaces of the hands with hand sanitizer
- 2Rub hands together to dry
- 3Unfold the gown
- 4Put on a gown, fully covering the torso and wrapping it around the back
- 5Fasten at the neck and the waist
- 6Put on gloves
- 7Extend the gloves over the wrists of the gown
- 8Explain the procedure to be performed to the resident
- 9Fill a basin with warm water
- 10Provide privacy for the resident; pull the privacy curtain
- 11Raise the side rail on the side of the bed that is opposite the working side of the bed, or request the RN Test Observer to stand on the side of the bed opposite the working side
- 12Raise the bed between mid-thigh and waist level
- 13Place a bath blanket or clean sheet over the resident to maintain privacy
- 14Turn resident [manikin] (side-to-side), or raise hips and place a waterproof pad under resident [manikin]
- 15Verbalize the act of checking while physically checking to see that urine can flow unrestricted into the drainage bag
- 16Use a new, clean washcloth with soap and water to carefully wash around the catheter where it exits the urethra
- 17With one hand, hold the catheter near the urethra to prevent tugging on the catheter Critical
- 18With the other hand, use a new, clean washcloth with soap and water, and clean at least 3-4 inches down the catheter tube from the urethra
- 19Clean with strokes only away from the urethra (A washcloth wrapped around the tubing with one stroke is okay) Critical
- 20Use a clean portion of a washcloth for any stroke
- 21Use a new, clean washcloth with water, and rinse the catheter tubing with strokes only away from the urethra (A washcloth wrapped around the tubing with one stroke is okay) Critical
- 22Use a clean portion of a washcloth for any stroke
- 23Pat dry with a clean towel
- 24Do not allow the tube to be pulled at any time during the procedure
- 25Replace the top cover over the resident
- 26Remove the bath blanket or sheet
- 27Remove the waterproof pad, without friction, by turning the resident [manikin] side-to-side or raising their hips
- 28Place all soiled linens in a designated container
- 29Empty, rinse, dry, and return equipment to storage
- 30Lower bed
- 31Lower side rail(s) if side rails were used
- 32Leave the resident in a position of comfort and safety
- 33Open the privacy curtain
- 34Maintain respectful, courteous interpersonal interactions at all times
- 35Place the call light or signaling device within easy reach of the resident
- 36Remove gloves BEFORE the gown turns inside out as they are removed
- 37Dispose of gloves in a designated container
- 38Unfasten the gown at the neck
- 39Unfasten the gown at the waist
- 40Pull the gown away from the neck, touching only the inside of the gown
- 41Turn the gown inside out and roll it into a bundle
- 42Dispose of the gown in the designated container
- 43Turn on the water
- 44Wet all surfaces of hands BEFORE applying soap
- 45Wet wrists BEFORE applying soap
- 46Apply soap to wet hands
- 47Rub your hands together using friction
- 48While hands are not under running water, rub hands together for at least 20 seconds
- 49Interlace fingers pointing downward
- 50Wash all surfaces of hands and wrists with soap
- 51Rinse hands and wrists thoroughly under running water with fingers pointed downward
- 52Dry hands and wrists with a clean paper towel(s)
- 53Immediately discard paper towel(s) in a trash container
- 54Turn off the faucet with a clean, dry paper towel
- 55Do not re-contaminate hands at any time during the hand-washing procedure (Using a wet paper towel to turn off the faucet is considered recontamination) Critical
Range of Motion
PROM: Shoulder
CredentiaHeadmasterPrometric· 45 states
6 min
- 1Knock on the door.
- 2Perform hand hygiene: Cover all surfaces of hands with hand sanitizer and rub hands together until completely dry.
- 3Explain the procedure to the client.
- 4Provide privacy - pull the curtain.
- 5Correctly support the client's joints by placing one hand under the client's elbow and the other hand under the client's wrist.
- 6Raise the client's arm up and over the client's head. (flexion)
- 7Bring the client's arm back down to the client's side. (extension)
- 8Complete flexion and extension of the client's shoulder at least three times.
- 9Continue the same support for the client's shoulder joint by placing one hand under the client's elbow and the other under the client's wrist.
- 10Move the client's entire arm away from the client's body. (abduction)
- 11Return the client's arm to the side of the client's body. (adduction)
- 12Complete abduction and adduction of the client's shoulder at least three times.
- 13Correctly support the client's joints by placing one hand under the client's knee and the other under the client's ankle.
- 14Bend the client's knee and hip toward the client's trunk. (flexion of hip and knee in the same motion - may also do separately)
- 15Straighten the client's knee and hip. (extension of hip and knee in the same motion - may also do separately)
- 16Complete flexion and extension of the client's knee and hip at least three times.
- 17Continue to correctly support the client's joints by placing one hand under the client's knee and the other under the client's ankle.
- 18Move the client's entire leg away from the body. (abduction)
- 19Move the client's entire leg toward the body. (adduction)
- 20Complete abduction and adduction of the client's hip at least three times.
- 21The candidate must ask the client if they are having any pain or discomfort during the ROM demonstration. Critical
- 22Leave the client in a comfortable position.
- 23Maintain respectful, courteous interpersonal interactions at all times.
- 24Place the call light or signaling device within easy reach of the client.
- 25Perform hand hygiene: Cover all surfaces of hands with hand sanitizer and rub hands together until completely dry.
Mobility
Ambulate with Gait/Transfer Belt
CredentiaHeadmasterPrometric· 44 states
5 min
- 1Knock on the door
- 2Introduce yourself to the resident
- 3Perform hand hygiene: a. Cover all surfaces of hands with hand sanitizer, b. Rub your hands together until they are completely dry
- 4Explain the procedure to the resident
- 5Obtain a gait belt
- 6Lock the bed brakes to ensure the resident's safety Critical
- 7Lower the bed so that the resident's feet are flat on the floor when sitting on the edge of the bed
- 8Bring the resident to a sitting position with the resident's feet flat on the floor
- 9Place a gait belt around the resident's waist to stabilize the trunk
- 10Tighten the gait belt
- 11Check the gait belt for tightness by slipping fingers between the gait belt and the resident
- 12Assist the resident in putting on non-skid footwear BEFORE standing
- 13Stand in front of and face the resident
- 14Grasp the gait belt on each side of the resident with an underhand grip
- 15Bring the resident to a standing position
- 16Ensure the resident is stable
- 17Position the walker in front of the resident
- 18Ensure the resident has a stabilized walker
- 19Position yourself behind and slightly to the side of the resident
- 20Instruct the resident on the proper use of a walker
- 21The candidate walks to the side, a little behind the resident
- 22Safely ambulate the resident 10 steps and return them to their chair
- 23Assist the resident in sitting in the chair in a controlled manner that ensures safety
- 24The candidate uses correct body mechanics at all times
- 25Remove the gait belt
- 26Leave the resident in a position of comfort and safety
- 27Perform hand hygiene: a. Cover all surfaces of hands with hand sanitizer, b. Rub your hands together until they are completely dry
- 28Place the call light or signal calling device within easy reach of the resident
- 29Maintain respectful, courteous interpersonal interactions at all times
Mobility
Transfer to Wheelchair
CredentiaHeadmasterPrometric· 44 states
5 min
- 1Perform hand hygiene: Cover all surfaces of hands with hand sanitizer and rub hands together until completely dry.
- 2Must verbalize acknowledgement that this is a one-person transfer per the resident's care plan.
- 3Explain the procedure to the resident.
- 4Obtain gait belt for the resident.
- 5Lock bed brakes to ensure resident's safety. Critical
- 6Adjust bed height to ensure resident's feet will be flat on the floor.
- 7Lock wheelchair brakes to ensure resident's safety. Critical
- 8Properly place gait belt around resident's waist to stabilize trunk.
- 9Tighten gait belt.
- 10Check gait belt for tightness by slipping fingers between gait belt and resident.
- 11Grasp gait belt with both hands.
- 12Bring resident to standing position.
- 13Use proper body mechanics at all times.
- 14Continue to grasp the gait belt.
- 15Stabilize resident.
- 16Ambulate resident at least 10 steps to the bed.
- 17Assist resident to pivot/turn.
- 18Sit resident on the bed.
- 19Sit resident on the bed in a controlled manner that ensures safety at all times.
- 20Remove gait belt.
- 21Remove non-skid footwear.
- 22Assist resident to lie down in the center of the bed.
- 23Make sure the resident is comfortable and in good body alignment.
- 24Lower bed.
- 25Place call light or signaling device within easy reach of resident.
- 26Maintain respectful, courteous interpersonal interactions at all times.
- 27Perform hand hygiene: Cover all surfaces of hands with hand sanitizer and rub hands together until completely dry.
Positioning
Positions on Side / Lateral
CredentiaHeadmasterPrometric· 44 states
5 min
- 1Knock on the door
- 2Introduce yourself to the resident
- 3Perform hand hygiene: a. Cover all surfaces of hands with hand sanitizer, b. Rub hands together until hands are completely dry
- 4Explain the procedure to the resident
- 5Provide privacy for the resident, pull the curtain
- 6Position the bed flat
- 7Raise bed height
- 8Ensure the resident's face is never obstructed by the pillow
- 9Direct the RN Test Observer to stand on the side opposite the working side of the bed to provide safety, use the side rail, or always turn the resident towards yourself
- 10Move the resident's upper body toward yourself from the working side of the bed
- 11Move the resident's hips toward yourself from the working side of the bed
- 12Move the resident's legs toward yourself from the working side of the bed
- 13Move to the opposite side of the bed if the RN Test Observer wasn't directed or the side rail wasn't used, and turn the resident toward self. Otherwise, the resident may remain on the working side of the bed and turn toward the RN Test Observer or raised side rail
- 14Assist/turn the resident on their left/right side. (Turned to correct side read to candidate by RN Test Observer.) Critical
- 15Check to be sure the resident is not lying on their downside arm
- 16Maintain correct body alignment with the head of the bed flat
- 17Ensure/place support device(s) under the resident's head
- 18Place support device(s) under the resident's upside arm
- 19Place support device(s) behind back
- 20Place support device(s) between knees
- 21Lower bed
- 22Lower side rail, if it was used
- 23Perform hand hygiene: a. Cover all surfaces of hands with hand sanitizer, b. Rub your hands together until they are completely dry
- 24Place the call light or signal calling device within easy reach of the resident
- 25Maintain respectful, courteous interpersonal interactions at all times
Range of Motion
PROM: Knee & Ankle
CredentiaHeadmasterPrometric· 43 states
5 min
- 1Perform hand hygiene: Cover all surfaces of the hands with hand sanitizer
- 2Rub hands together to dry
- 3Explain the procedure to be performed to the resident
- 4Raise the bed between mid-thigh and waist level
- 5Provide privacy for the resident; pull the privacy curtain
- 6Position the resident supine (bed flat)
- 7Leave the resident in good body alignment
- 8Place one hand under the resident's knee and the other hand under the resident's ankle
- 9Move the entire leg away from the resident's body (abduction)
- 10Move the entire leg back toward the resident's body (adduction)
- 11Complete abduction and adduction of the resident's hip at least three times
- 12Continue correctly supporting joints by placing one hand under the resident's knee and the other under the resident's ankle
- 13Bend the resident's knee and hip toward the resident's trunk (flexion of hip and knee at the same time)
- 14Straighten the resident's knee and hip (extension of the knee and hip at the same time)
- 15Complete flexion and extension of the resident's knee and hip at least three times
- 16The candidate must ask at least once if they are causing any pain or discomfort Critical
- 17Do not force any joint beyond the point of free movement
- 18Leave the resident in a supine position
- 19Lower bed
- 20Open the privacy curtain
- 21Maintain respectful, courteous interpersonal interactions at all times
- 22Place the call light or signaling device within easy reach of the resident
- 23Perform hand hygiene: Cover all surfaces of the hands with hand sanitizer
- 24Rub hands together to dry
Hygiene
Foot Care
CredentiaHeadmasterPrometric· 41 states
6 min
- 1Perform hand hygiene: Cover all surfaces of hands with hand sanitizer
- 2Rub hands together until hands are completely dry
- 3Explain the procedure to the resident (Speak clearly and directly, maintaining face-to-face contact whenever possible)
- 4Provide for privacy
- 5Fill a basin with comfortably warm water
- 6Place the basin on a protective barrier and in a comfortable position for the resident
- 7Put on gloves BEFORE washing the resident's foot
- 8Immerse the resident's bare foot into the water
- 9Use water and a soapy washcloth
- 10Wash entire foot
- 11Wash between toes
- 12Rinse the entire foot
- 13Rinse between toes
- 14Dry foot thoroughly
- 15Dry thoroughly between the resident's toes
- 16Apply lotion to the top and bottom of the resident's foot
- 17Avoid getting lotion between the resident's toes
- 18If any excess lotion is on the resident's foot, wipe with a towel/washcloth
- 19Support foot and ankle during the procedure
- 20Empty equipment
- 21Rinse equipment
- 22Dry equipment
- 23Return equipment to storage
- 24Placed soiled linens in a designated laundry hamper
- 25Remove gloves, turning them inside out as they are removed and dispose of
- 26Perform hand hygiene: Cover all surfaces of hands with hand sanitizer
- 27Rub hands together until hands are completely dry
- 28Place call light or signaling device within easy reach of resident
- 29Maintain respectful, courteous interpersonal interactions at all times
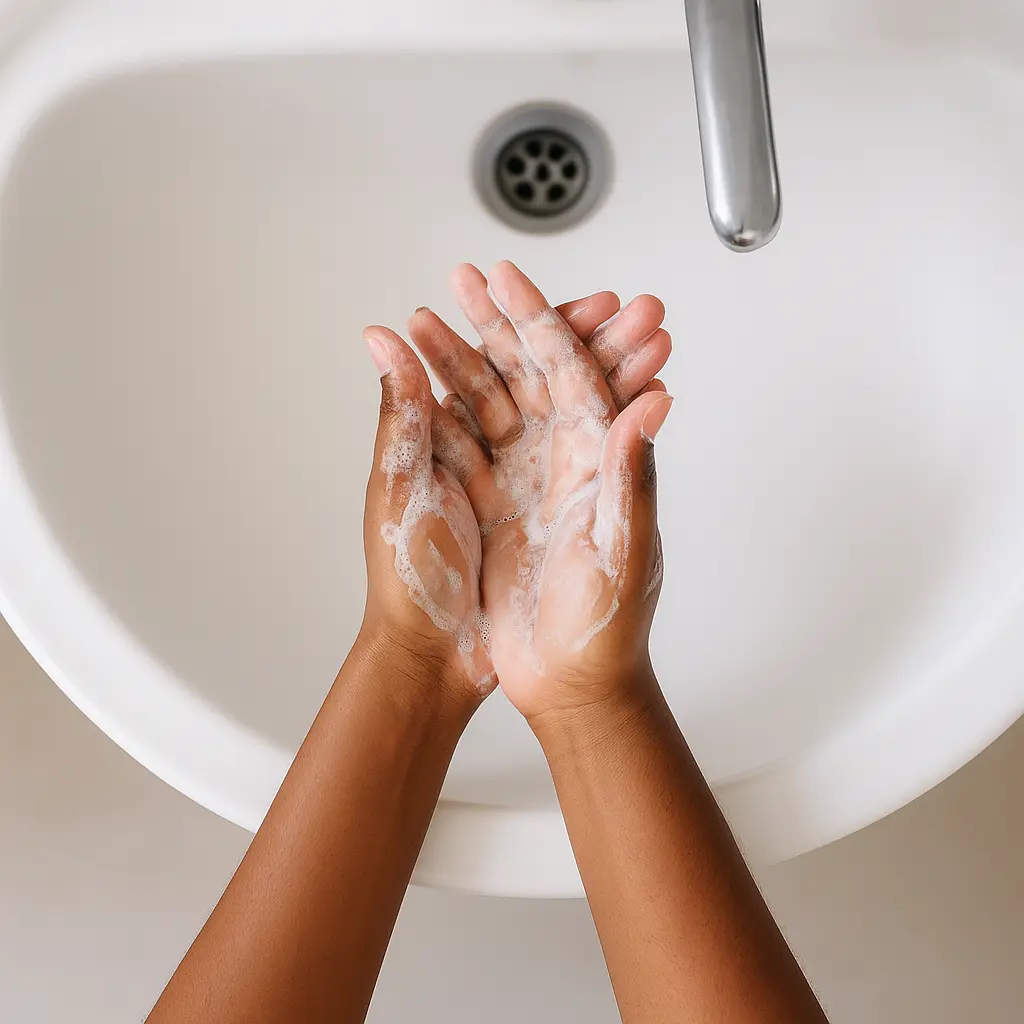
Infection Control
Hand Hygiene (Handwashing)
CredentiaHeadmasterPrometric· 33 states
2 min
- 1Remove watch and bracelets or push up 4 to 5 inches above hand. Remove all rings except a smooth wedding band.
- 2Stand away from sink so clothes do not touch the sink.
- 3Turn on the faucet and adjust the water to a warm, comfortable temperature.
- 4Wet hands thoroughly, including three to four inches above wrists.
- 5Hold hands with wrists lower than elbows during hand washing procedure.
- 6Apply a generous amount of soap to hands.
- 7Rub palms together to work up a good lather for at least 15 seconds.
- 8Steps 9-12 should last at least 20 seconds. Wash using friction and rotating motion.
- 9Wash the palms and back of hands.
- 10Wash fingers and between fingers.
- 11Wash wrists and lower arms.
- 12Clean well under fingernails by rubbing fingers against palms. Use nail file or orange stick to clean under fingernails.
- 13Rinse well from arms to hands.
- 14With a clean dry paper towel or towels, pat dry starting at fingertips working to wrist. Discard towel(s).
- 15Repeat step on wet hand with clean dry towel(s). Discard towel(s).
- 16Turn off faucet with clean, dry paper towel and discard in wastebasket. Critical
Hygiene
Applies Elastic Stocking
CredentiaHeadmaster· 31 states
5 min
- 1Perform hand hygiene: Cover all surfaces of hands with hand sanitizer
- 2Rub hands together until hands are completely dry
- 3Explain the procedure to the resident (Speak clearly and directly, maintaining face-to-face contact whenever possible)
- 4Raise bed height
- 5Provide for privacy
- 6Provide for resident's privacy by only exposing one leg
- 7Roll, gather, or turn the stocking down inside out to at least the heel
- 8Place the foot of the stocking over the resident's toes, foot, and heel
- 9Roll OR pull the top of the stocking over the resident's foot, heel, and up the leg
- 10Move the resident's foot and leg gently and naturally, avoiding force and over-extension of limbs and joints
- 11Check toes for possible pressure from stocking
- 12Adjust stocking as needed
- 13Leave resident with a stocking that is smooth/wrinkle-free Critical
- 14Lower bed
- 15Place call light or signal calling device within easy reach of the resident
- 16Maintain respectful, courteous interpersonal interactions at all times
- 17Perform hand hygiene: Cover all surfaces of hands with hand sanitizer
- 18Rub hands together until hands are completely dry
Vital Signs
Counts Respirations
CredentiaPrometric· 31 states
4 min
- 1Greet resident, address by name, and introduce self
- 2Provide explanations to resident about care before beginning and during care
- 3Measure rate of respirations without providing instructions to resident about how to breathe
- 4Count respirations for one full minute Critical
- 5Record resident's respiration rate on Measurement Form within +/- 2 breaths per minute of nurse's measurement
- 6Ask resident about preferences during care
- 7Use Standard Precautions and infection control measures when providing care
- 8Ask resident about comfort or needs during care or before care completed
- 9Promote resident's rights during care
- 10Promote resident's safety during care
Elimination
Urinary Drainage Bag
HeadmasterPrometric· 28 states
8 min
- 1Perform hand hygiene: Cover all surfaces of the hands with hand sanitizer
- 2Rub hands together to dry
- 3Unfold the gown
- 4Put on a gown, fully covering the torso and wrapping it around the back
- 5Fasten at the neck and the waist
- 6Put on goggles or a face shield appropriately over the eyes or face
- 7Put on gloves
- 8Extend the gloves over the wrists of the gown
- 9Explain the procedure to be performed to the resident
- 10Provide privacy for the resident; pull the privacy curtain
- 11Raise the bed between mid-thigh and waist level
- 12Place a barrier on the floor under the drainage bag
- 13Place the graduate on the previously placed barrier
- 14Open the drain to allow the urine to flow into the graduate until the bag is empty
- 15Do not remove the bag from the bed or lift the bag above the edge of the bed
- 16Avoid touching the graduate with the tip of the tubing
- 17Close the drain
- 18Wipe the drain with an antiseptic wipe AFTER the drainage bag is empty
- 19Replace the drain in the holder
- 20Lower bed
- 21Place the graduate on a level, flat surface
- 22With the graduate at eye level, read the output
- 23Empty the graduate into the designated toilet
- 24Rinse, dry, and return equipment to storage
- 25Leave the resident in a position of comfort and safety
- 26Record output on the provided, previously signed recording form
- 27The candidate's measured output reading is within 25 mLs of the RN Test Observer's output reading Critical
- 28Open the privacy curtain
- 29Maintain respectful, courteous interpersonal interactions at all times
- 30Place the call light or signaling device within easy reach of the resident
- 31Remove gloves BEFORE the gown turns inside out as they are removed
- 32Dispose of gloves in a designated container
- 33Remove the goggles or face shield from the back by lifting the ear pieces or the headband
- 34Place goggles or the face shield in a designated container
- 35Unfasten the gown at the neck
- 36Unfasten the gown at the waist
- 37Pull the gown away from the neck, touching only the inside of the gown
- 38Turn the gown inside out and roll it into a bundle
- 39Dispose of the gown in the designated container
- 40Turn on the water
- 41Wet all surfaces of hands BEFORE applying soap
- 42Wet wrists BEFORE applying soap
- 43Apply soap to wet hands
- 44Rub your hands together using friction
- 45While hands are not under running water, rub hands together for at least 20 seconds
- 46Interlace fingers pointing downward
- 47Wash all surfaces of hands and wrists with soap
- 48Rinse hands and wrists thoroughly under running water with fingers pointed downward
- 49Dry hands and wrists with a clean paper towel(s)
- 50Immediately discard paper towel(s) in a trash container
- 51Turn off the faucet with a clean, dry paper towel
- 52Do not re-contaminate hands at any time during the hand-washing procedure (Using a wet paper towel to turn off the faucet is considered recontamination) Critical
Bed Making
Changes Bed Linen
HeadmasterPrometric· 24 states
8 min
- 1Greet the resident by name.
- 2Explain the procedure to the resident.
- 3Gather supplies: clean linens (bottom sheet, draw sheet, top sheet, blanket, pillowcase), laundry bag.
- 4Provide for the resident's privacy by closing the door and/or pulling the privacy curtain. Critical
- 5Wash hands. Critical
- 6Raise the bed to a safe working height.
- 7Lower the head of the bed.
- 8Lock bed brakes. Critical
- 9Lower the side rail on the side you are working from.
- 10Cover resident with bath blanket if available.
- 11Loosen top linens at foot of bed.
- 12Remove top linens from under bath blanket.
- 13Place soiled linens in laundry bag; do not place on floor. Critical
- 14Turn resident away from you onto their side.
- 15Loosen bottom linens.
- 16Roll soiled bottom linens toward resident.
- 17Place clean bottom sheet on bed, tucking under mattress.
- 18Place clean draw sheet on bed if used.
- 19Fan-fold clean linens toward resident.
- 20Turn resident toward you, over the linens, onto clean side.
- 21Go to other side of bed.
- 22Remove soiled linens and place in laundry bag. Critical
- 23Pull clean bottom sheet tight and tuck under mattress.
- 24Pull draw sheet tight and tuck under mattress.
- 25Turn resident onto back and center in bed.
- 26Place clean top sheet over resident.
- 27Remove bath blanket from under top sheet.
- 28Place blanket over top sheet if needed.
- 29Tuck top linens under mattress at foot, making a toe pleat.
- 30Miter corners at foot of bed.
- 31Change pillowcase.
- 32Position pillow under resident's head.
- 33Lower the bed to its lowest position.
- 34Place call light within resident's reach. Critical
- 35Remove laundry bag.
- 36Wash hands. Critical
Vital Signs
Measures Weight
CredentiaHeadmaster· 23 states
6 min
- 1Knock on the door
- 2Introduce yourself to the resident
- 3Perform hand hygiene: a. Cover all surfaces of hands with hand sanitizer, b. Rub hands together until hands are completely dry
- 4Explain the procedure to the resident
- 5Obtain a gait belt
- 6Position the wheelchair arm or wheel so that it touches the side of the bed
- 7The wheelchair is placed at a slight angle to the bed
- 8Raise the bed to the same level as the wheelchair seat
- 9Lock wheelchair brakes to ensure the resident's safety Critical
- 10Lock the bed brakes to ensure the resident's safety Critical
- 11Place a gait belt around the resident's waist to stabilize the trunk
- 12Tighten gait belt
- 13Check the gait belt for tightness by slipping fingers between the gait belt and the resident
- 14Ensure the resident's feet are flat on the floor
- 15Instruct the resident to place their hands on the wheelchair armrests
- 16Ensure the resident is stable
- 17Grasp the gait belt in an underhand grip with both hands to stabilize the resident
- 18Bring the resident to a standing position using proper body mechanics
- 19Do not ambulate the resident
- 20Assist the resident in pivoting and sitting on the bed in a controlled manner that ensures safety
- 21Remove the gait belt
- 22Remove the resident's footwear
- 23Assist the resident to lie down in the center of the bed, supporting extremities as necessary
- 24Make sure the resident is comfortable and in good body alignment
- 25Perform hand hygiene: a. Cover all surfaces of hands with hand sanitizer, b. Rub your hands together until they are completely dry
- 26Place the call light or signal calling device within easy reach of the resident
- 27Maintain respectful, courteous interpersonal interactions at all times
Hygiene
Hand & Nail Care
HeadmasterPrometric· 22 states
5 min
- 1Perform hand hygiene: Cover all surfaces of hands with hand sanitizer
- 2Rub hands together until hands are completely dry
- 3Explain the procedure to the resident
- 4Fill a basin with comfortably warm water
- 5Immerse the resident's (left/right) hand in warm water (The scenario read to you will specify whether it is left or right)
- 6Soak the resident's nails for at least five (5) minutes
- 7You may verbalize the at least 5 minutes of soaking time after you begin soaking the nails
- 8Dry the resident's hand thoroughly
- 9Specifically dry between the resident's fingers
- 10Gently clean under the resident's nails with an orange stick
- 11File each fingernail
- 12Apply lotion to the resident's hand
- 13Empty equipment
- 14Rinse equipment
- 15Dry equipment
- 16Return equipment to storage
- 17Place soiled linens in a designated laundry hamper
- 18Place the call light or signaling device within easy reach of resident
- 19Maintain respectful, courteous interpersonal interactions at all times
- 20Perform hand hygiene: Cover all surfaces of hands with hand sanitizer
- 21Rub hands together until hands are completely dry
Vital Signs
Manual Blood Pressure
CredentiaHeadmaster· 22 states
5 min
- 1Perform hand hygiene: Cover all surfaces of hands with hand sanitizer
- 2Rub hands together until hands are completely dry
- 3Explain the procedure to the resident
- 4Provide for the resident's privacy
- 5Position the resident with their forearm supported in a palm-up position
- 6Position the resident with their forearm approximately at the level of the heart
- 7If the resident is wearing a sleeveless top, roll the resident's sleeve up to expose the upper arm
- 8Apply the appropriately sized cuff around the resident's upper arm, just above the elbow
- 9Line cuff arrows up with the resident's brachial artery
- 10Clean the earpieces of the stethoscope
- 11Place the stethoscope earpieces in your ears
- 12Clean the diaphragm of the stethoscope
- 13Locate the resident's brachial artery with fingertips
- 14Place the stethoscope diaphragm over the brachial artery
- 15Hold the stethoscope diaphragm snugly in place
- 16Inflate the cuff to 160-180 mmHg
- 17Slowly release air from the cuff until the disappearance of pulsations
- 18Remove cuff
- 19Record blood pressure reading on the previously signed recording form
- 20The candidate's recorded diastolic blood pressure is within 8mmHg of the RN Test Observer's recorded diastolic blood pressure Critical
- 21The candidate's recorded systolic blood pressure is within 8mmHg of the RN Test Observer's recorded systolic blood pressure Critical
- 22Place the call light or signaling device within easy reach of the resident
- 23Maintain respectful, courteous interpersonal interactions at all times
- 24Perform hand hygiene: Cover all surfaces of hands with hand sanitizer
- 25Rub hands together until hands are completely dry
Infection Control
Donning & Removing PPE
CredentiaHeadmaster· 21 states
3 min
- 1Perform hand hygiene. a. Cover all surfaces of hands with hand sanitizer. b. Rub your hands together until they are completely dry.
- 2Face the back opening of the gown.
- 3Unfold the gown.
- 4Place arms through each sleeve.
- 5Secure the neck opening.
- 6Secure the waist, making sure that the back flaps cover clothing as completely as possible.
- 7Put on gloves.
- 8Ensure that the gloves overlap the gown sleeves at the wrist.
- 9Knock.
- 10Introduce yourself to the resident.
- 11Explain the procedure to the resident.
- 12Place a barrier on the floor under the drainage bag.
- 13Place the graduate on the previously placed barrier.
- 14Open the drain to allow the urine to flow into the graduate.
- 15Avoid touching the graduate with the tip of the tubing.
- 16Close the drain.
- 17Wipe the drain with an alcohol wipe AFTER emptying the drainage bag.
- 18Replace the drain in the holder.
- 19Place the graduate on a level, flat surface.
- 20With the graduate at eye level, read the output.
- 21Empty the graduate into the designated toilet.
- 22Rinse equipment, emptying the rinse water into the designated toilet.
- 23Return equipment to storage.
- 24Leave the resident in a position of comfort and safety.
- 25Place the call light or signaling device within easy reach of the resident.
- 26Maintain respectful, courteous interpersonal interactions at all times.
- 27Remove gloves, turning them inside out.
- 28Remove gloves BEFORE removing the gown.
- 29Dispose of the gloves in an appropriate container.
- 30Unfasten the gown at the neck.
- 31Unfasten the gown at the waist.
- 32Remove the gown by folding the soiled area to the soiled area.
- 33Dispose of the gown in an appropriate container.
- 34Record the output in mL on the previously signed recording form.
- 35The Candidate’s recorded measurement is within 25mL of the RN Test Observer's measurement. Critical
- 36Wash hands: Begin by wetting your hands.
- 37Apply soap to hands.
- 38Rub hands together using friction.
- 39Rub hands together for at least twenty (20) seconds.
- 40Interlace fingers pointing downward.
- 41Wash all surfaces of your hands with soap.
- 42Wash wrists with soap.
- 43Rinse your hands thoroughly under running water with your fingers pointed downward.
- 44Dry hands with a clean paper towel(s).
- 45Turn off the faucet with a clean, dry paper towel.
- 46Discard paper towels in the trash container as used.
- 47Do not recontaminate your hands by touching the faucet or sink at any time during or after the hand-washing procedure. Critical
Elimination
Measures Urinary Output
CredentiaHeadmaster· 18 states
7 min
- 1Greet the resident by name.
- 2Explain the procedure to the resident.
- 3Gather supplies: bedpan, bedpan cover, toilet tissue, graduate/measuring container, protective pad, gloves.
- 4Provide for the resident's privacy by closing the door and/or pulling the privacy curtain. Critical
- 5Wash hands. Critical
- 6Put on gloves. Critical
- 7Raise the bed to a safe working height.
- 8Lower the head of the bed.
- 9Place protective pad under resident's buttocks.
- 10Ask resident to raise hips or assist resident to turn to side.
- 11Position the bedpan under the resident's buttocks.
- 12Raise the head of the bed for resident's comfort.
- 13Place toilet tissue and call light within resident's reach.
- 14Allow resident privacy to use the bedpan.
- 15Return when resident signals.
- 16Lower the head of the bed.
- 17Remove the bedpan carefully and cover it.
- 18Provide perineal care or assist resident to clean self.
- 19Remove and dispose of protective pad.
- 20Remove gloves and dispose properly. Critical
- 21Wash hands. Critical
- 22Put on clean gloves. Critical
- 23Take bedpan to bathroom and pour urine into graduate.
- 24Measure urine at eye level on a flat surface. Critical
- 25Note the amount of urine.
- 26Empty graduate into toilet and flush.
- 27Rinse bedpan and graduate; return to proper storage.
- 28Remove gloves and dispose properly. Critical
- 29Wash hands. Critical
- 30Lower the bed to its lowest position.
- 31Place call light within resident's reach. Critical
- 32Record urinary output on intake/output sheet. Critical
Vital Signs
Electronic Blood Pressure
Credentia· 18 states
5 min
- 1Explains procedure, speaking clearly, slowly and directly, maintaining face-to-face contact whenever possible.
- 2Privacy is provided with a curtain, screen or door.
- 3Has client assume a comfortable lying or sitting position.
- 4Client's arm is positioned at level of heart with palm up and upper arm is exposed.
- 5Selects appropriate cuff size.
- 6Feels for brachial artery on inner aspect of arm, at bend of elbow.
- 7Places blood pressure cuff snugly on client's upper arm and sensor/arrow is over the brachial artery site.
- 8Turns on the machine and ensures device is functioning. If the machine has different settings for infants, children and adults, selects the appropriate setting.
- 9Pushes start button. If cuff inflates to more than 200 mm Hg then stops machine and uses cuff on client's other arm.
- 10Waits until the blood pressure reading appears on the screen and for the cuff to deflate, then removes the cuff.
- 11Signaling device is within reach.
- 12Before recording, washes hands.
- 13After obtaining reading using BP cuff, records both systolic and diastolic pressures exactly as displayed on the digital screen. Critical
Range of Motion
PROM: Elbow & Wrist
HeadmasterPrometric· 15 states
4 min
- 1Knock before entering the room. Identify and greet resident. Explain procedure. Perform hand hygiene. Provide for privacy.
- 2Raise side rails. Raise the bed to the best level for good body mechanics. Critical
- 3Lower the side rail of the side you are working.
- 4Position the resident supine and in good alignment.
- 5Support the resident's wrist with both of your hands.
- 6Flexion: bend the hand down.
- 7Extension: straighten the hand.
- 8Hyperextension: bend the hand back.
- 9Radial flexion: turn the hand toward the thumb.
- 10Ulnar flexion: turn the hand toward the little finger.
- 11Repeat flexion, extension, hyperextension, and radial and ulnar flexion 5 to 6 times.
- 12Raise the side rail. Critical
- 13Go to the other side and lower the side rail.
- 14Repeat steps for exercising the wrist (may verbalize this step).
- 15Make sure the resident is comfortable.
- 16Raise side rail. Lower bed. Lower side rails. Attach signal light within resident's reach. Critical
- 17Perform hand hygiene and report & record observations.
General
Indirect / Comfort Care
Prometric· 14 states
2 min
- 1Greet resident, address by name, and introduce self
- 2Provide explanations to resident about care before beginning and during care
- 3Ask resident about preferences during care
- 4Use Standard Precautions and infection control measures when providing care Critical
- 5Ask resident about comfort or needs during care or before care completed
- 6Promote resident's rights during care
- 7Promote resident's safety during care
Vital Signs
Measures Blood Pressure
Headmaster· 4 states
5 min
- 1Greet the resident by name.
- 2Explain the procedure to the resident.
- 3Gather supplies: sphygmomanometer (blood pressure cuff), stethoscope.
- 4Provide for the resident's privacy by closing the door and/or pulling the privacy curtain. Critical
- 5Wash hands. Critical
- 6Position resident comfortably with arm supported at heart level. Critical
- 7Expose upper arm.
- 8Apply cuff snugly around upper arm, 1-2 inches above the elbow. Critical
- 9Locate brachial artery with fingertips. Critical
- 10Place stethoscope earpieces in ears.
- 11Place diaphragm of stethoscope over brachial artery. Critical
- 12Close valve on bulb and inflate cuff to 160-180 mmHg.
- 13Open valve slowly, deflating cuff at 2-4 mmHg per second. Critical
- 14Note the systolic reading when first sound is heard. Critical
- 15Note the diastolic reading when sound disappears. Critical
- 16Deflate cuff completely and remove from arm.
- 17Wash hands. Critical
- 18Place call light within resident's reach. Critical
- 19Record blood pressure reading. Critical
Safety
Responds to Choking
Headmaster· 3 states
3 min
- 1The candidate is able to identify symptoms of choking. Evaluate choking by asking the resident, "Are you choking?" Critical
- 2The candidate verbalizes that they would call for help Critical
- 3Stand behind the resident and wrap arms around the resident's waist
- 4Make a fist with one hand
- 5Place the thumb side of the fist against the resident's abdomen
- 6Position your fist slightly above the navel and below the xiphoid process
- 7Grasp the fist with the other hand and press the fist and hand into the resident's abdomen with an inward, upward thrust 6-10 times. Must demonstrate at least one upward thrust and then verbalize the rest
- 8Stop and ask the resident, "Are you still choking?" If the resident indicates yes Critical
- 9The candidate should indicate that they would repeat this procedure until it is successful or until the resident loses consciousness
- 10The candidate verbalizes that they would notify the nurse
Elimination
Incontinence / Brief Change
Headmaster· 2 states
3 min
- 1Greets resident by name
- 2Introduces self by name
- 3Identifies self as a CNA
- 4Performs hand hygiene
- 5Explains procedure to resident
- 6Dons gloves
- 7Lowers head of bed flat
- 8Undoes front tabs of soiled brief
- 9Rolls soiled brief down between resident's legs
- 10Separates labia majora
- 11Wipes down center of labia and vaginal area, starting with urinary meatus
- 12Wipes down both sides of labia, starting with urinary meatus
- 13Wipes upper thighs
- 14Rolls resident onto side
- 15Wipes anal area clean to dirty
- 16Removes soiled brief
- 17Places soiled brief into plastic bag or waste container
- 18Does not place plastic bag with soiled brief on clean surface
- 19Removes gloves
- 20Perform hand hygiene
- 21Dons gloves
- 22Tucks clean brief under resident
- 23Rolls resident onto back
- 24Secures clean brief in place
- 25Removes gloves
- 26Performs hand hygiene immediately after removing gloves and before placing call light and water
- 27Call light is left within resident's reach
- 28Water is left within resident's reach
- 29Test candidate used disposable cleansing wipes
- 30Test candidate discarded soiled wipes by tucking into soiled brief or into waste container
- 31Test candidate wiped clean to dirty for each stroke
- 32Test candidate used different part of wipe or new wipe for each stroke
Hygiene
Hair Care
Headmaster· 2 states
4 min
- 1Perform hand hygiene: Cover all surfaces of the hands with hand sanitizer
- 2Rub hands together to dry
- 3Explain the procedure to be performed to the resident
- 4Provide privacy for the resident; pull the privacy curtain
- 5Place a towel on the resident's shoulders
- 6Ask the resident how they would like their hair styled
- 7Comb/brush/style hair gently and completely
- 8Place linen in a designated container
- 9Leave the resident's hair neatly brushed/combed/styled
- 10Open the privacy curtain
- 11Maintain respectful, courteous interpersonal interactions at all times
- 12Place the call light or signaling device within easy reach of the resident
- 13Perform hand hygiene: Cover all surfaces of the hands with hand sanitizer
- 14Rub hands together to dry
Hygiene
Shaving
Headmaster· 2 states
6 min
- 1Knock before entering the room. Identify and greet resident. Explain procedure. Perform hand hygiene. Provide for privacy.
- 2Raise the bed rails. Raise the bed to the best level for good body mechanics. Critical
- 3Fill the wash basin with warm water.
- 4Place wash basin and needed supplies on the over-bed table.
- 5Lower the side rail on the side you are working.
- 6Put on disposable gloves. Critical
- 7Place the resident in Fowler's with the over-bed table in front of resident. Place a bath towel over the resident's chest and shoulders. Place resident's dentures in mouth if applicable.
- 8Wash the resident's face. Do not dry. Wet the washcloth and wring it out.
- 9Apply the wet washcloth to resident's face to soften skin/beard for a few minutes (may verbalize amount of time).
- 10Apply shaving cream.
- 11Hold the skin taut with one hand.
- 12Shave in the direction of hair growth with long strokes on the larger areas of the face. Use shorter strokes around the chin and lips.
- 13Rinse shaving cream off of razor often.
- 14Wash off any remaining shaving cream. Pat face dry with a towel.
- 15Verbalize observing for nicks, cuts, bleeding, and irritation. Apply direct pressure if observed. Critical
- 16Apply after shave and lotion unless nicks or cuts are observed (may verbalize).
- 17Remove towel. Remove and discard gloves. Critical
- 18Raise side rail. Lower bed. Lower side rails. Attach signal light within resident's reach. Critical
- 19Clean and return equipment and supplies to their proper place. Clean the over-bed table.
- 20Dispose of safety razor in the sharps container (may verbalize).
- 21Wash hands and report & record observations.
Nutrition
Fluid Intake / Fresh Water
Headmaster· 2 states
5 min
- 1Perform hand hygiene: Cover all surfaces of hands with hand sanitizer; Rub hands together until hands are completely dry
- 2Assemble equipment as required: ice (marbles used as simulated ice), scoop
- 3Explain procedure to the resident
- 4Obtain water pitcher from resident's room
- 5Empty water pitcher and verbalize cleaning the water pitcher
- 6Scoop ice (marbles) into water pitcher
- 7Properly use ice scoop -or- uses ice dispenser without contaminating water or water pitcher (does not allow ice to touch hand and fall back into pitcher or scoop to touch pitcher) Critical
- 8Properly store ice scoop, if scoop was used (scoop placed in appropriate receptacle after each use) Critical
- 9Add water to pitcher
- 10Return pitcher to resident's bedside stand/table
- 11Pours resident a fresh glass of water
- 12Maintain respectful, courteous interpersonal interactions at all times
- 13Leave call light or signaling device within easy reach of the resident
- 14Perform hand hygiene: Cover all surfaces of hands with hand sanitizer; Rub hands together until hands are completely dry
Positioning
Fowler's Position
Headmaster· 2 states
3 min
- 1Knock before entering the room. Identify and greet resident. Explain procedure. Perform hand hygiene. Provide for privacy.
- 2Raise the head of the bed to a 45-60 degree angle. Critical
- 3Keep the spine straight.
- 4Support the head with a pillow.
- 5Support the arms with pillows.
- 6Attach signal light within the resident's reach. Critical
- 7Perform hand hygiene and report & record observations.
Positioning
Position Resident on their Side in Bed
Headmaster· 2 states
5 min
- 1Greet the resident by name.
- 2Perform hand hygiene: Cover all surfaces of hands with hand sanitizer and rub hands together until completely dry.
- 3Introduce yourself by name.
- 4Explain the procedure to the resident.
- 5Provide privacy for the resident; pull the privacy curtain.
- 6Position the bed flat.
- 7Raise the bed to a comfortable working height.
- 8Ensure that the resident's face never becomes obstructed by the pillow. Critical
- 9Direct the RN Test Observer to stand on the opposite side of the bed to provide for safety, or always turn the resident towards yourself. Critical
- 10From the working side of the bed, move the resident's head toward yourself to provide room to turn the resident on their side safely.
- 11From the working side of the bed, move the resident's hips toward yourself to provide room to turn the resident on their side safely.
- 12From the working side of the bed, move the resident's legs toward yourself to provide room to turn the resident on their side safely.
- 13Assist/turn the resident on their side.
- 14The resident is placed on the correct RN Test Observer stated side.
- 15Ensure the resident is not lying on their downside arm.
- 16Maintain correct body alignment.
- 17Place support devices under the head, such as pillows, wedges, blankets, etc., to maintain correct body alignment and protect bony prominences. Critical
- 18Place support devices under the upside arm, such as pillows, wedges, blankets, etc., to maintain correct body alignment and protect bony prominences. Critical
- 19Place support devices behind the back, such as pillows, wedges, blankets, etc., to maintain correct body alignment and protect bony prominences. Critical
- 20Place support devices between the knees, such as pillows, wedges, blankets, etc., to maintain correct body alignment and protect bony prominences. Critical
- 21Lower bed.
- 22Perform hand hygiene: Cover all surfaces of hands with hand sanitizer and rub hands together until completely dry.
- 23Place call light or signaling device and water within easy reach of the resident.
- 24Maintain respectful, courteous interpersonal interactions at all times.
Positioning
Reposition in Bed
Headmaster· 2 states
5 min
- 1Knock on the door.
- 2Perform hand hygiene: Cover all surfaces of hands with hand sanitizer and rub hands together until completely dry.
- 3Explain the procedure to the client.
- 4Provide privacy - pull the curtain.
- 5Position the bed flat.
- 6Raise the bed to a comfortable working height.
- 7Ensure that the client's face never becomes obstructed by the pillow. Critical
- 8Assist/turn the client onto the correct side as read to them in the scenario.
- 9Check to be sure the client is not lying on their arm.
- 10Maintain the client's correct body alignment.
- 11Place support devices under the client's head. Critical
- 12Place support devices under the client's top arm. Critical
- 13Place support devices behind the client's back. Critical
- 14Place support devices between the client's knees. Critical
- 15Lower bed.
- 16Lower side rail, if it was used.
- 17Maintain respectful, courteous interpersonal interactions at all times.
- 18Leave the call light or signaling device within easy reach of the client.
- 19Perform hand hygiene: Cover all surfaces of hands with hand sanitizer and rub hands together until completely dry.
Positioning
Supine Position
Headmaster· 2 states
3 min
- 1Knock before entering the room. Identify and greet resident. Explain procedure. Perform hand hygiene. Provide for privacy.
- 2Raise bed rails. Raise the bed to best level for good body mechanics. Critical
- 3Lower rail on side where you are working.
- 4Place a pillow under the resident's head and shoulders.
- 5Roll resident into supine position.
- 6Position arms comfortably at each side.
- 7Raise side rail. Lower bed. Lower side rail. Attach signal light within resident's reach. Critical
- 8Perform hand hygiene and report & record observations.
Range of Motion
Range of Motion
Headmaster· 2 states
10 min
- 1Perform hand hygiene: Cover all surfaces of hands with hand sanitizer; Rub hands together until hands are completely dry
- 2Explain procedure to the resident
- 3Provide for resident's privacy
- 4Position resident supine and in good body alignment
- 5Correctly support the extremity/joint being exercised Critical
- 6Move shoulder through flexion, extension, rotation, abduction, and adduction at least three times Critical
- 7Move elbow through flexion and extension at least three times Critical
- 8Move wrist through flexion, extension, and rotation at least three times Critical
- 9Move hip through flexion, extension, rotation, abduction, and adduction at least three times Critical
- 10Move knee through flexion and extension at least three times Critical
- 11Move ankle joint through flexion, extension, rotation, abduction, and adduction at least three times Critical
- 12Do not cause discomfort or pain and do not force any joint beyond the point of free movement Critical
- 13Maintain respectful, courteous interpersonal interactions at all times
- 14Leaves call light or signaling device within easy reach of the resident
- 15Perform hand hygiene: Cover all surfaces of hands with hand sanitizer; Rub hands together until hands are completely dry
Vital Signs
Weighing an Ambulatory Resident
Headmaster· 2 states
4 min
- 1Knock on the door
- 2Introduce yourself to the resident
- 3Perform hand hygiene: a. Cover all surfaces of hands with hand sanitizer, b. Rub hands together until hands are completely dry
- 4Explain the procedure to the resident
- 5Balance (or zero) scale Critical
- 6Assist the resident to stand
- 7Walk the resident to the scale
- 8Assist the resident in stepping on the scale
- 9Check that the resident is centered on the scale
- 10Check that the resident has their arms at their sides
- 11Check that the resident is not holding onto anything that would alter the weight reading
- 12Appropriately adjust weights until the scale is in balance
- 13Return the resident to the chair
- 14Assist the resident to sit in the chair
- 15Perform hand hygiene: a. Cover all surfaces of hands with hand sanitizer, b. Rub your hands together until they are completely dry
- 16Place call light or signal calling device within easy reach of the resident
- 17Maintain respectful, courteous interpersonal interactions at all times
- 18Record weight on the previously signed recording form
- 19The candidate's recorded weight varies no more than two (2) pounds from the RN Test Observer's recorded weight Critical
Elimination
Assists with Commode / Urinal
Headmaster· 1 states
2 min
- 1Do initial steps Critical
- 2Place commode next to bed on resident's unaffected side Critical
- 3Assist resident to commode Critical
- 4Give resident call light and toilet paper Critical
- 5If resident is able to be left alone, step out of bathroom and return when called
- 6Put on gloves (according to procedure 2) Critical
- 7Assist resident wipe area from front to back Critical
- 8Help resident into bed
- 9Remove and cover pan and take to bathroom
- 10Check urine and/or feces for color, odor, amount & character and report unusual findings to nurse Critical
- 11Dispose of urine and/or feces, sanitize pan and return pan according to current nursing practices
- 12Remove gloves (according to procedure 2) Critical
- 13Assist resident to wash hands Critical
- 14Do final steps Critical
Hygiene
Drape and Undrape
Headmaster· 1 states
2 min
- 1Do initial steps Critical
- 2To drape, unfold drape over top linen Critical
- 3Ask resident to hold drape or tuck drape under resident's shoulders
- 4Roll top linen from beneath drape to foot of bed Critical
- 5Perform procedure
- 6To undrape, cover resident with top linen Critical
- 7Ask resident to hold top of linen or tuck under resident's shoulders
- 8Roll drape from under top linen to foot of bed and remove Critical
- 9Do final steps Critical
Hygiene
Gown Change
Headmaster· 1 states
2 min
- 1Do initial steps Critical
- 2Untie soiled gown
- 3Draw top sheet over resident's chest Critical
- 4Remove resident's arms from gown, unaffected arm first Critical
- 5Roll soiled gown from neck down and remove from beneath sheet Critical
- 6Slide resident's arms into clean gown, affected arm first Critical
- 7Tie gown
- 8Remove top sheet from beneath clean gown and cover resident Critical
- 9Do final steps Critical
Hygiene
Shower / Tub Bath
Headmaster· 1 states
3 min
- 1Do initial steps Critical
- 2Clean shower area and shower chair
- 3Help resident remove clothing. Drape resident with bath blanket
- 4Turn on water and have resident check water temperature Critical
- 5Assist resident into shower and lock wheels of shower chair Critical
- 6Let resident wash as much as possible, starting with face Critical
- 7Help resident shampoo and rinse hair
- 8Stay with resident during procedure Critical
- 9Give resident towel and assist to pat dry Critical
- 10Assist resident out of shower
- 11Help resident dress, comb hair and return to room
- 12Do final steps Critical
Hygiene
Skin Check
Headmaster· 1 states
2 min
- 1Do initial steps Critical
- 2Drape resident (according to procedure 14)
- 3Check bony areas including ears, shoulder blades, elbows, coccyx, hips, knees, ankles and heels for redness and warmth Critical
- 4Check friction areas including under breasts and arms, between buttocks, groin, thighs, skin folds, contracted areas, and around any tubing for redness, irritation, moisture and odor Critical
- 5Undrape resident (according to procedure 14)
- 6Report any unusual findings to the nurse immediately Critical
- 7Do final steps Critical
Mobility
Assists with Walker
Headmaster· 1 states
2 min
- 1Do initial steps Critical
- 2Assist resident to sit on edge of bed (according to procedure 7) Critical
- 3Place walker in front of resident Critical
- 4Have resident grasp both arms of walker
- 5Brace leg of walker with your foot and place your hand on top of walker
- 6Assist resident to stand on count of three Critical
- 7Stand to side and slightly behind resident Critical
- 8Have resident move walker ahead 6 to 10 inches then step up to walker
- 9Do final steps Critical
Mobility
Transfer to Chair
Headmaster· 1 states
2 min
- 1Do initial steps Critical
- 2Place chair on resident's unaffected side. Brace firmly against side of bed Critical
- 3Assist resident to sit on edge of bed (according to procedure 7) Critical
- 4Stand at resident's side
- 5Have resident grasp farthest arm of chair Critical
- 6Tell resident to stand on count of three Critical
- 7Help resident slowly turn and sit
- 8Check body alignment
- 9Do final steps Critical
Mobility
Walking
Headmaster· 1 states
2 min
- 1Do initial steps Critical
- 2Assist resident to sit on edge of bed (according to procedure 7) Critical
- 3Assist resident to stand on count of three Critical
- 4Allow resident to gain balance Critical
- 5Stand to side and slightly behind resident Critical
- 6Walk at resident's pace
- 7Do final steps Critical
Range of Motion
PROM: Hip
Headmaster· 1 states
5 min
- 1Knock before entering the room. Identify and greet resident. Explain procedure. Perform hand hygiene. Provide for privacy.
- 2Raise side rails. Raise the bed to the best level for good body mechanics. Critical
- 3Lower the side rail on the side you are working.
- 4Position the resident supine and in good alignment. Cover resident with a bath blanket and remove top linens.
- 5Place one hand under the resident's knee and the other hand under the ankle to support the leg.
- 6Flexion: raise the leg.
- 7Extension: straighten the leg.
- 8Abduction: move the leg away from the body.
- 9Adduction: move the leg toward the other leg.
- 10Internal rotation: turn the leg inward.
- 11External rotation: turn the leg outward.
- 12Repeat flexion, extension, abduction, adduction, and inward and outward rotation 5 to 6 times.
- 13Cover the resident.
- 14Raise the side rail. Critical
- 15Go to the other side and lower the side rail.
- 16Repeat steps for exercising the hip (may verbalize).
- 17Make sure the resident is comfortable.
- 18Cover the resident with top linens. Remove the bath blanket.
- 19Raise side rail. Lower bed. Lower side rails. Attach signal light within resident's reach. Critical
- 20Perform hand hygiene and report & record observations.
Safety
Applies Restraints
Headmaster· 1 states
2 min
- 1Do initial steps Critical
- 2Apply vest according to manufacturer's directions Critical
- 3Apply soft belt according to manufacturer's directions Critical
- 4Fasten with quick release tie to moveable part of bed frame or kick spurs of wheelchair Critical
- 5Place open hand flat between resident and protective device Critical
- 6Do final steps Critical
- 7Visit resident at least every hour and release protective device at least every two hours Critical
Safety
Emergency: Fall / Faint
Headmaster· 1 states
2 min
- 1Call for nurse and stay with resident Critical
- 2Check if resident is breathing Critical
- 3Do not move resident Critical
- 4Talk to resident in calm and supportive manner
- 5Apply direct pressure to any bleeding area
- 6Take pulse and respiration
- 7Assist nurse as directed
- 8Do final steps Critical
- 9Assist with documentation according to current nursing practices Critical
- 10Check resident frequently according to current nursing practices Critical
Safety
Emergency: Fire
Headmaster· 1 states
1 min
- 1Remove residents from area of immediate danger Critical
- 2Activate fire alarm Critical
- 3Close doors and windows to contain fire Critical
- 4Extinguish small fire with fire extinguisher if possible Critical
- 5Follow all facility policies Critical
Safety
Emergency: Seizure
Headmaster· 1 states
2 min
- 1Call for nurse and stay with resident Critical
- 2Place padding under head and move furniture away from resident Critical
- 3Do not restrain resident or place anything in mouth Critical
- 4Loosen resident's clothing especially around neck Critical
- 5After seizure stops, position resident onto side Critical
- 6Note duration of seizure and areas involved Critical
- 7Do final steps Critical
- 8Assist with documentation according to current nursing practices Critical
Vital Signs
Measures Temperature
Headmaster· 1 states
5 min
- 1Do initial steps Critical
- 2Position resident comfortably in bed or chair
- 3Rinse thermometer in cool water and dry with clean tissue
- 4Remove resident's arm from sleeve of gown and wipe axillary area with towel Critical
- 5Hold thermometer at stem end and shake down to below the lowest number Critical
- 6Put on disposable sheath, if applicable
- 7Place bulb end of thermometer in center of armpit and fold resident's arm over chest Critical
- 8Hold in place for 10 minutes Critical
- 9Gently remove thermometer, wipe with tissue from stem to bulb or remove sheath and dispose of tissue or sheath Critical
- 10Hold thermometer at eye level. Rotate until line appears. Accurately read & record temperature according to current nursing practices Critical
- 11Shake down, clean and store thermometer according to current nursing practice
- 12Put resident's arm back into sleeve of gown
- 13Do final steps Critical
- 14Report unusual reading to nurse Critical